
August 18, 2014
DIY Preppy Bider Sides (Back to school series)
Hi everyone! Thanks so much for all of your positive feedback on my last binder DIY post. For all those who wanted to see, in this post I’m showing you how to DIY the sides to match your binder covers.

Enjoy!
Step 1: Search your favorite pattern on Google and select a photo that would work for the background. I normally use the same photo I used to make my binder cover.

Step 2: Copy and paste the photo of the pattern into Microsoft word. ( same as in the binder cover tutorial)
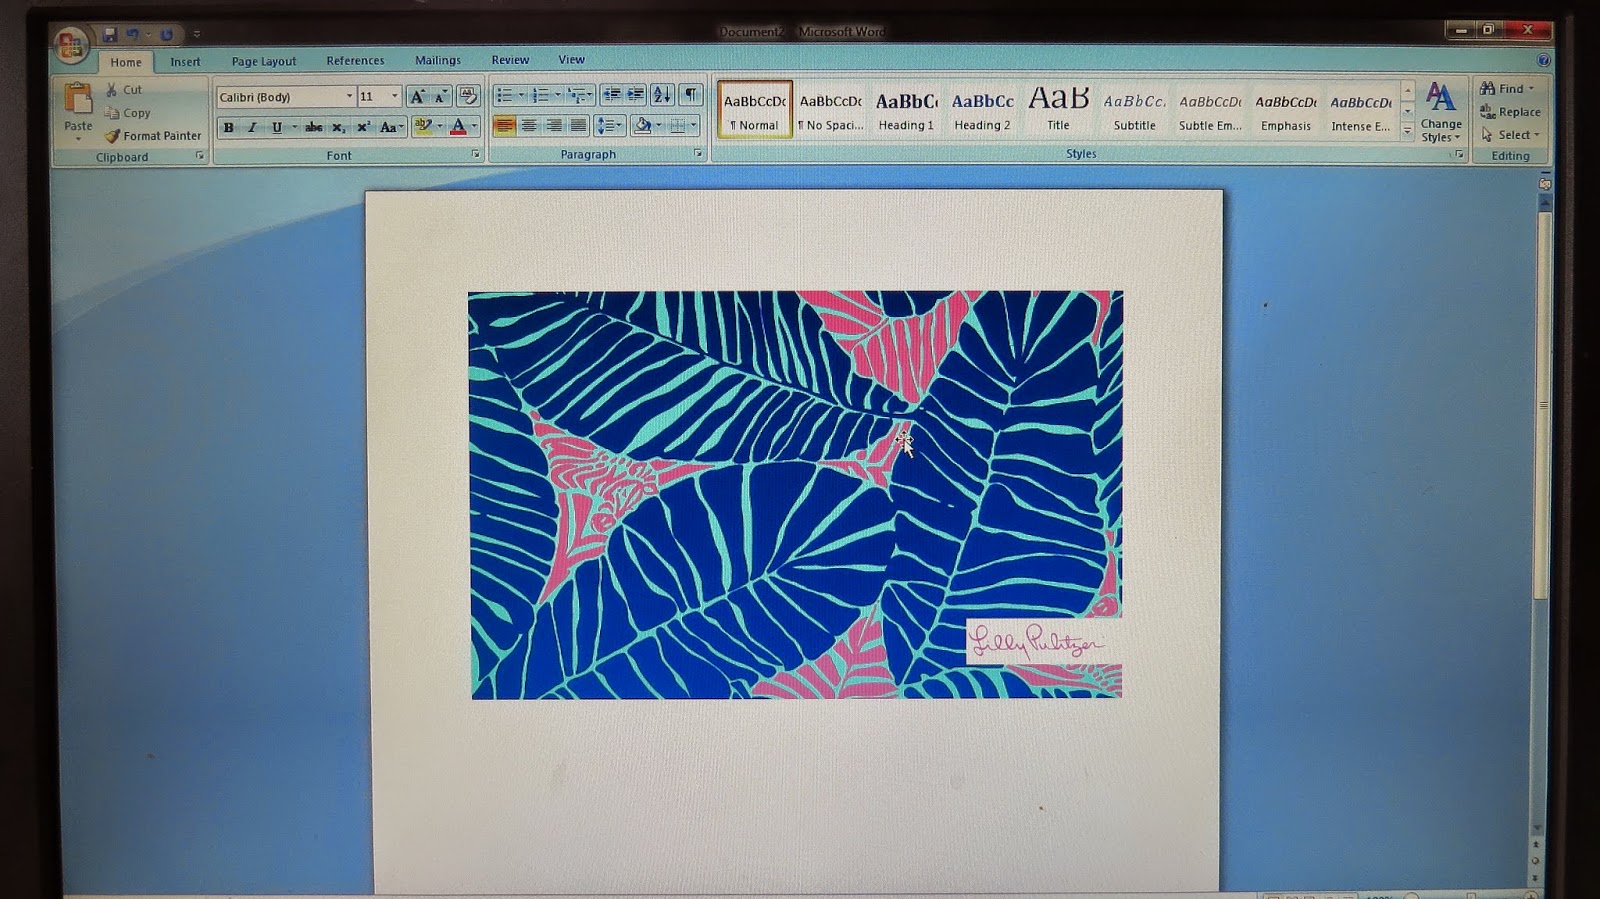
Step 3: Rotate the image if needed. Then stretch the image so the length is to the top and bottom of the page (11 inches). I would recommend setting your text wrapping to in front of text to make it easier to move.


Step 4: Crop the image width to the amount of inches your binder is. (meaning for a 2 inch binder make the width 2 inches, a 1 inch binder width should be 1 inch, etc.). This width will be too big, but I found it easier to cut it later to make it fit perfectly. I added the ruler feature by going to view, then checking ruler box to accurately measure. (see picture on how to add ruler)


Step 5: WOHOO time to add the monogram. When I First did this I Googled “free monogram maker” and a bunch of websites came up. After looking at a few I found THIS was my favorite. P.S. everything on this website is adorable. Pick your monogram and type in your initials.

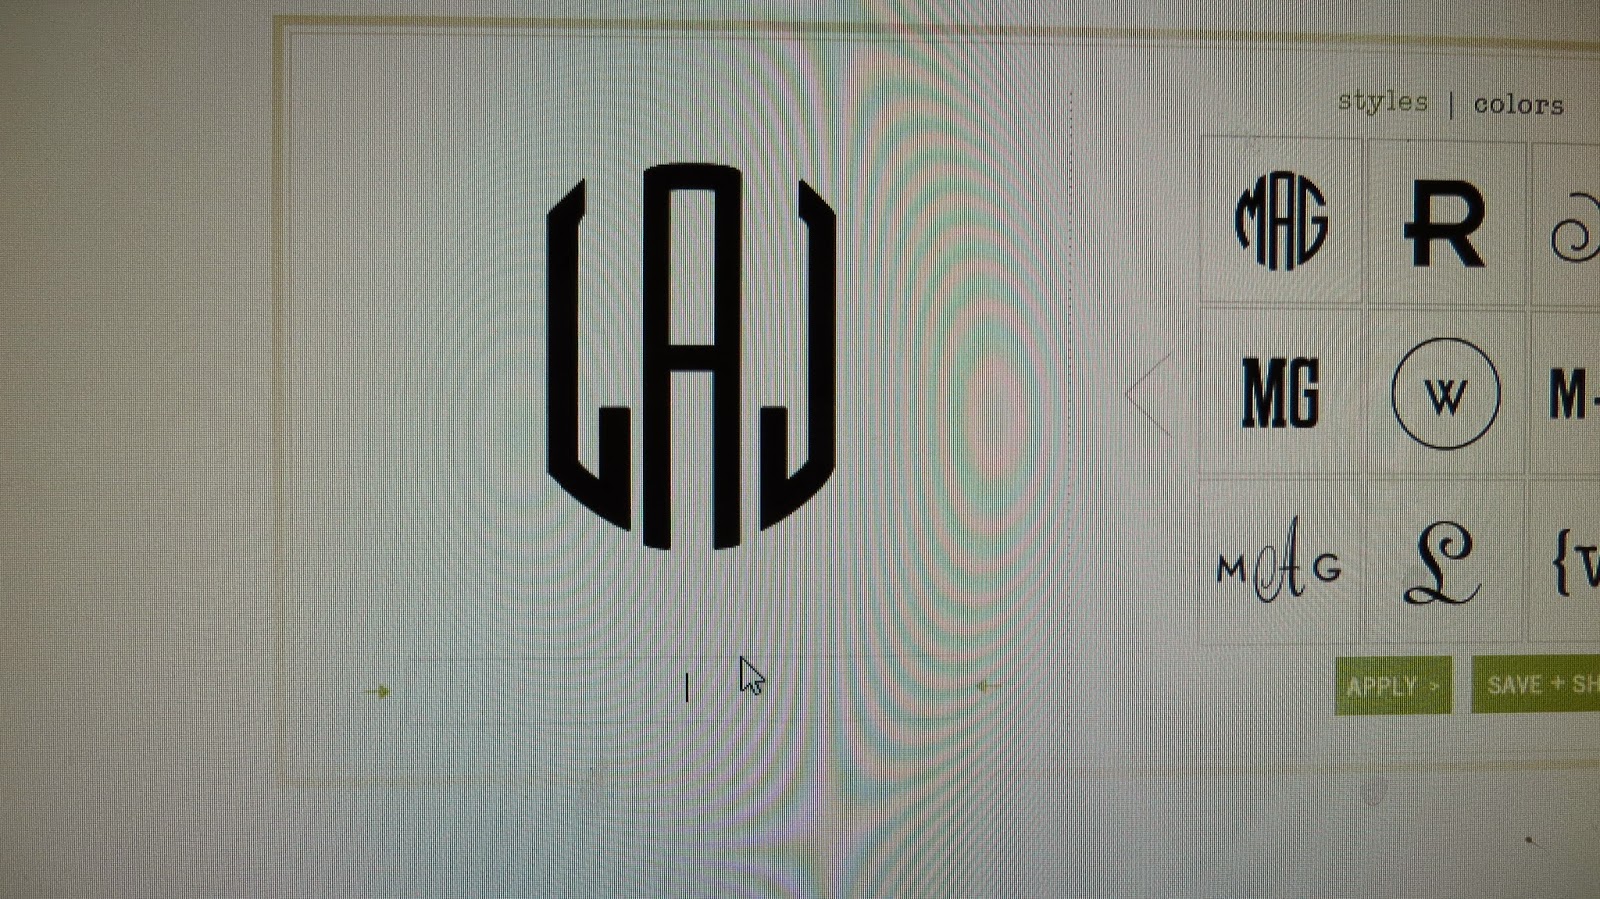
Step 6: Save the monogram (all you need to do is type in your email).

Step 7: Copy and paste into your Microsoft Word document. I also cropped mine so there was less of a white background. You can always change the background color to match your pattern, re-size it, and personalize it in any way you want! Then place your monogram on top of your pattern. Also be sure to put more than one binder side on each sheet of paper before you print to save paper and trees 🙂


Step 8: TA DA! Your done! Print and slide into your binder! I had a little trouble sliding the sides into the smaller binders, try cutting it down to slide it in easier.

Hope you enjoyed this tutorial, and have fully PREPed binders for school!
P.S. DIY sticker tutorial is next in the Back to School series!
xo, Abby


